OpenAPI와 스웨거를 활용한 실전 API 설계를 읽고 ... (1)
어느 날 DigitalOcean 블로그에서 "journey to Python Client generation" 글을 보았다.
최근 전자공시시스템의 OPENDART와 한국투자증권의 OpenKIS 연동하면서
규격화된 무언가가 있어서 간단하고 빠르게 클라이언트 코드 생성 했으면 좋겠다고 생각하던 차였다.
DigitalOcean's journey to Python Client generation
In this blog post, we will dive into our journey of building our new Python Client, and how we used code generation to create the SDK.
www.digitalocean.com
요약하면 DigitalOcean의 api를 OpenAPI로 정의하고 Micosoft에서 개발한 autorest(https://github.com/Azure/autorest)로
클라이언트 코드를 생성한다는 내용이다.
와우!! 한번 배워두면 RestAPI로 연동하는 코드는 쉽게 만들겠다 싶어 OpenAPI 책을 읽게 되었다.
autorest는 Github wiki 보면서 정리할 예정

1. API와 OpenAPI 정의
API는 각 서비스가 제공할 수 있는 것이 무엇이고, 다른 서비스와 어떻게 상호작용할 수 있는지를 정의한다.
API 생태계에서 API는 생태계가 흩어지지 않고 잘 유지되도록 붙잡아 두는 역할을 담당하고 있다.
API 생태계에서 개별 서비스들이 어떻게 연결돼 있는지를 알아야 전체를 이해할 수 있는 큰 그림을 그릴 수 있는데
이를 OpenAPI에 정의함으로써 쉽게 알 수 있다.
또한 API의 변경사항도 쉽게 파악 가능해져서 API 생태계가 깨지는 걸 막아준다.
2. 스웨거란?
스웨거 프로젝트는 스웨거 UI와 대략적인 YAML 파일 작성 가이드로 시작됐고,
이를 토대로 더 많은 도구가 만들어졌고 명세와 표준이 되었다.
이런 도구와 명세를 모두 합쳐서 스웨거(Swagger)라고 부른다.
2015년, 스웨거 프로젝트는 스마트베어에 인수되고 명세 부분은 리눅스 파운데이션에 OpenAPI라는 이름으로 기부되었다.
https://spec.openapis.org/oas/latest.html#openapi-specification
OpenAPI Specification v3.1.0 | Introduction, Definitions, & More
Version 3.1.0 The key words “MUST”, “MUST NOT”, “REQUIRED”, “SHALL”, “SHALL NOT”, “SHOULD”, “SHOULD NOT”, “RECOMMENDED”, “NOT RECOMMENDED”, “MAY”, and “OPTIONAL” in this document are to be interpreted as describe
spec.openapis.org
https://swagger.io/docs/specification/about/
About Swagger Specification | Documentation | Swagger
What Is OpenAPI? OpenAPI Specification (formerly Swagger Specification) is an API description format for REST APIs. An OpenAPI file allows you to describe your entire API, including: Available endpoints (/users) and operations on each endpoint (GET /users,
swagger.io
3. HTTP 호출하기
포스트맨으로 하는법과 terminal에서 command를 이용하여 호출하는 법을 소개하는데 command 방법을 소개한다.
$> telnet farmstall.designapis.com 80    <-- http
$> openssl s_client -quiet -connect farmstall.designapis.com:443  <-- https


# Header
GET /v1/reviews HTTP/1.1 <enter>
Host: farmstall.designapis.com <enter>
<enter> # 아래는 Body
4. OpenAPI 첫인상
openapi 에는 버전(3.0.3)을 입력한다.
info에는
version: API version
title: API title
description: API 설명 "|-"로 여러 줄을 마크다운으로 작성 가능하다.
contact: 연락처.
license: API 라이센스
가 올 수 있다.
externalDocs에는 외부 문서링크를 입력하고 tag를 달 수 있으며 마지막으로 servers에 서버 목록을 정의할 수 있다.
openapi: 3.0.3
info:
version: v1
title: FarmStall API
description: |-
마크다운 작성
An API for writing reviews about your favourite (or worst) farm stalls.
...중략
"A totally average place." — Jane Fair
<br/>

contact:
name: Josh Ponelat
email: jponelat+daso@gmail.com
url: https://farmstall.designapis.com
license:
url: https://www.apache.org/licenses/LICENSE-2.0
name: Apache 2.0
externalDocs:
url: https://farmstall.designapis.com
description: Hosted docs
tags:
- name: Reviews
description: Reviews of your favourite/worst farm stalls
- name: Users
description: Users and authentication
servers:
- url: "https://farmstall.designapis.com/v1"
description: Production server
5. OpenAPI 조회 GET
paths 아래
실제 구현된 API의 path를 정의하고 ※ /reviews/{reviewId}
HTTP method를 넣는다. get, post, delete, put
HTTP method 별로 정의된 tag를 추가할 수 있고, description으로 API 설명도 가능하다.
parameters에는 name, in, schema를 선언할 수 있다.
in에는 path, query, header, cookie가 올 수 있다.
보다 자세한 parameters 설명은 swagger 페이지를 참고하자.
...
paths:
  /reviews/{reviewId}:
    get:
      tag:
      - Reveiws
      description: Get a single review
      parameters:
        - name: reviewId
          in: path
          required: true
          schema:
            type: string
            description: The review's ID
            example: 3b5b1707-b82c-4b1d-9078-157053902525
            minLength: 36
            maxLength: 36
            pattern: "[a-zA-Z0-9-]+"
      response:
        "200":
          description: A single review
6. OpenAPI 조회 응답 정의
parameters와 같은 depth에 responses를 정의한다.
응답 코드를 적고 description에 설명을 적는다.
parameters와 조금 다르게 json 리턴은
content -> application/json -> schema 순으로 데이터를 정의한다.
responses:
  "200":
    description: A single review
    content:
      application/json:
        schema:
          type: object
          properties:
            message:
              type: string
              example: An awesome time for the whole family.
            rating:
              type: integer
              minimum: 1
              maximum: 5
              example: 5
            userId:
              minLength: 36
              maxLength: 36
              pattern: "^[a-zA-Z0-9-]+$"
              nullable: true
              example: 3b5b1707-b82c-4b1d-9078-157053902525
            uuid:
              minLength: 36
              maxLength: 36
              pattern: "^[a-zA-Z0-9-]+$"
              example: 3b5b1707-b82c-4b1d-9078-157053902525
  "404":
    description: Review not found
6-1. 응답 코드 카테고리
| 범위 | 카테고리 | 참고 |
| 1xx | Informational | 서버가 요청을 받았다는 임시 응답. 웹소켓 연결로 업그레이드 됐을 때 사용되는것이 가장 대표적인 예 |
| 2xx | Success | 200 OK나 201 Created 처럼 요청 성공을 의미 |
| 3xx | Redirects | 요청 자원의 위치/URI가 변경됐음을 의미 |
| 4xx | Client Error | 클라이언트가 제공한 요청 정보에 오류가 있음을 의미 |
| 5xx | Server Error | 서버 처리 과정에 오류가 있음을 의미 |
6-2. 주요 미디어 타입
| 미디어 타입 | 설명 |
| text/html | 웹 서버가 반환해 주는 HTML |
| text/csv | 쉼표로 구분된 값 |
| image/png | PNG 형식으로 인코딩된 이미지 |
| application/json | JSON 데이터 |
| application/xml | XML 데이터 |
7. OpenAPI 자원생성 Post
GET과 다른 부분은 parameters 대신
requestBody -> content -> application/json -> schema로 데이터 정의가 바뀌었다는 점이다.
paths:
  /reviews:
    post:
      tags:
        - Reviews
      description: Create a new Review
      requestBody:
        description: A new Review
        content:
          application/json:
            schema:
              type: object
              properties:
                message:
                  type: string
                  example: An awesome time for the whole family.
                rating:
                  type: integer
                  minimum: 1
                  maximum: 5
                  example: 5
8. OpenAPI 자원생성 응답 정의
응답은 GET 방식의 응답과 다르지 않다.
...
                minimum: 1
                maximum: 5
                example: 5
    responses:
      "201":
        description: Successfully created a new Review
        content:
          application/json:
            schema:
              type: object
              example:
                message: A lovely experience
                rating: 4
              properties:
                message:
                  type: string
                  example: An awesome time for the whole family.
                rating:
                  type: integer
                  minimum: 1
                  maximum: 5
                  example: 5
9. 인증과 인가
인증: 누구인지를 증명하는 일이며 아이디와 비밀번호를 통해 증명한다.
인가: 사용자 상세 정보를 조회하거나 새 후기를 생성하는 것처럼 특정 행위나 특정 자원에 대한 접근을 허가받는 것을 의미한다.
9-1. 인증 준비
POST /users로 신규 유저를 등록하고
POST /token을 통해 MyUserToken 값을 얻어오는 API를 정의한다.
#... paths:
  /users:
    post:
      tags:
        - users
      description: This can only be done by the logged in user.
      operationId: createUser
      requestBody:
        description: Created user object
        content:
          application/json:
            schema:
              type: object
              properties:
                username:
                  type: string
                  example ponelat
                password:
                  type: string
                  format: passwrod
                fullname:
                  type: string
                  example: Josh Ponelat
      response:
        '201':
          description: Successfully created a new user
          content:
          application/json:
          schema:
            type: object
            properties:
              username:
                type: string
                example: ponelat
              uuid:
                type: string
                example: f7f680a8-d111-421f-b6b3-493ebf905078
  /tokens:
    post:
      description: Create a new token
      operationId: createToken
      requestBody:
        description: Created token object
        content:
          application/json:
            schema:
              type: object
              properties:
                username:
                  type: string
                  example: ponelat
                password:
                  type: string
                  format: password
      response:
        '201':
          description: Create a new token for gaining access to resources.
          content:
            application/json:
            schema:
              type: object
              properties:
                token:
                  type: string
9-2. 인가 처리
POST /tokens에서 가져온 token을 Post /reviews Authorization 헤더에 추가해서
인증과 인가된 사용자만 후기 생성할 수 있도록 작업한다.
components -> securitySchemes -> [SecurityName]으로 보안 스킴을 정의하고
인가가 필요한 API에는 security를 정의하고 [SecurityName]을 추가한다.
openapi: 3.0.3
#...

paths:
  /reviews:
    post:
      #...
      security:
        - {}  # <-- 보안이 필수가 아닌 선택으로 할 경우 해당 line 추가
        - MyUsertoken: []


componets:
  securitySchemes:
    MyUserToken:
      type: apiKey
      in: header      # apiKey, http, oauth2, openIdConnect
      name: Authorization
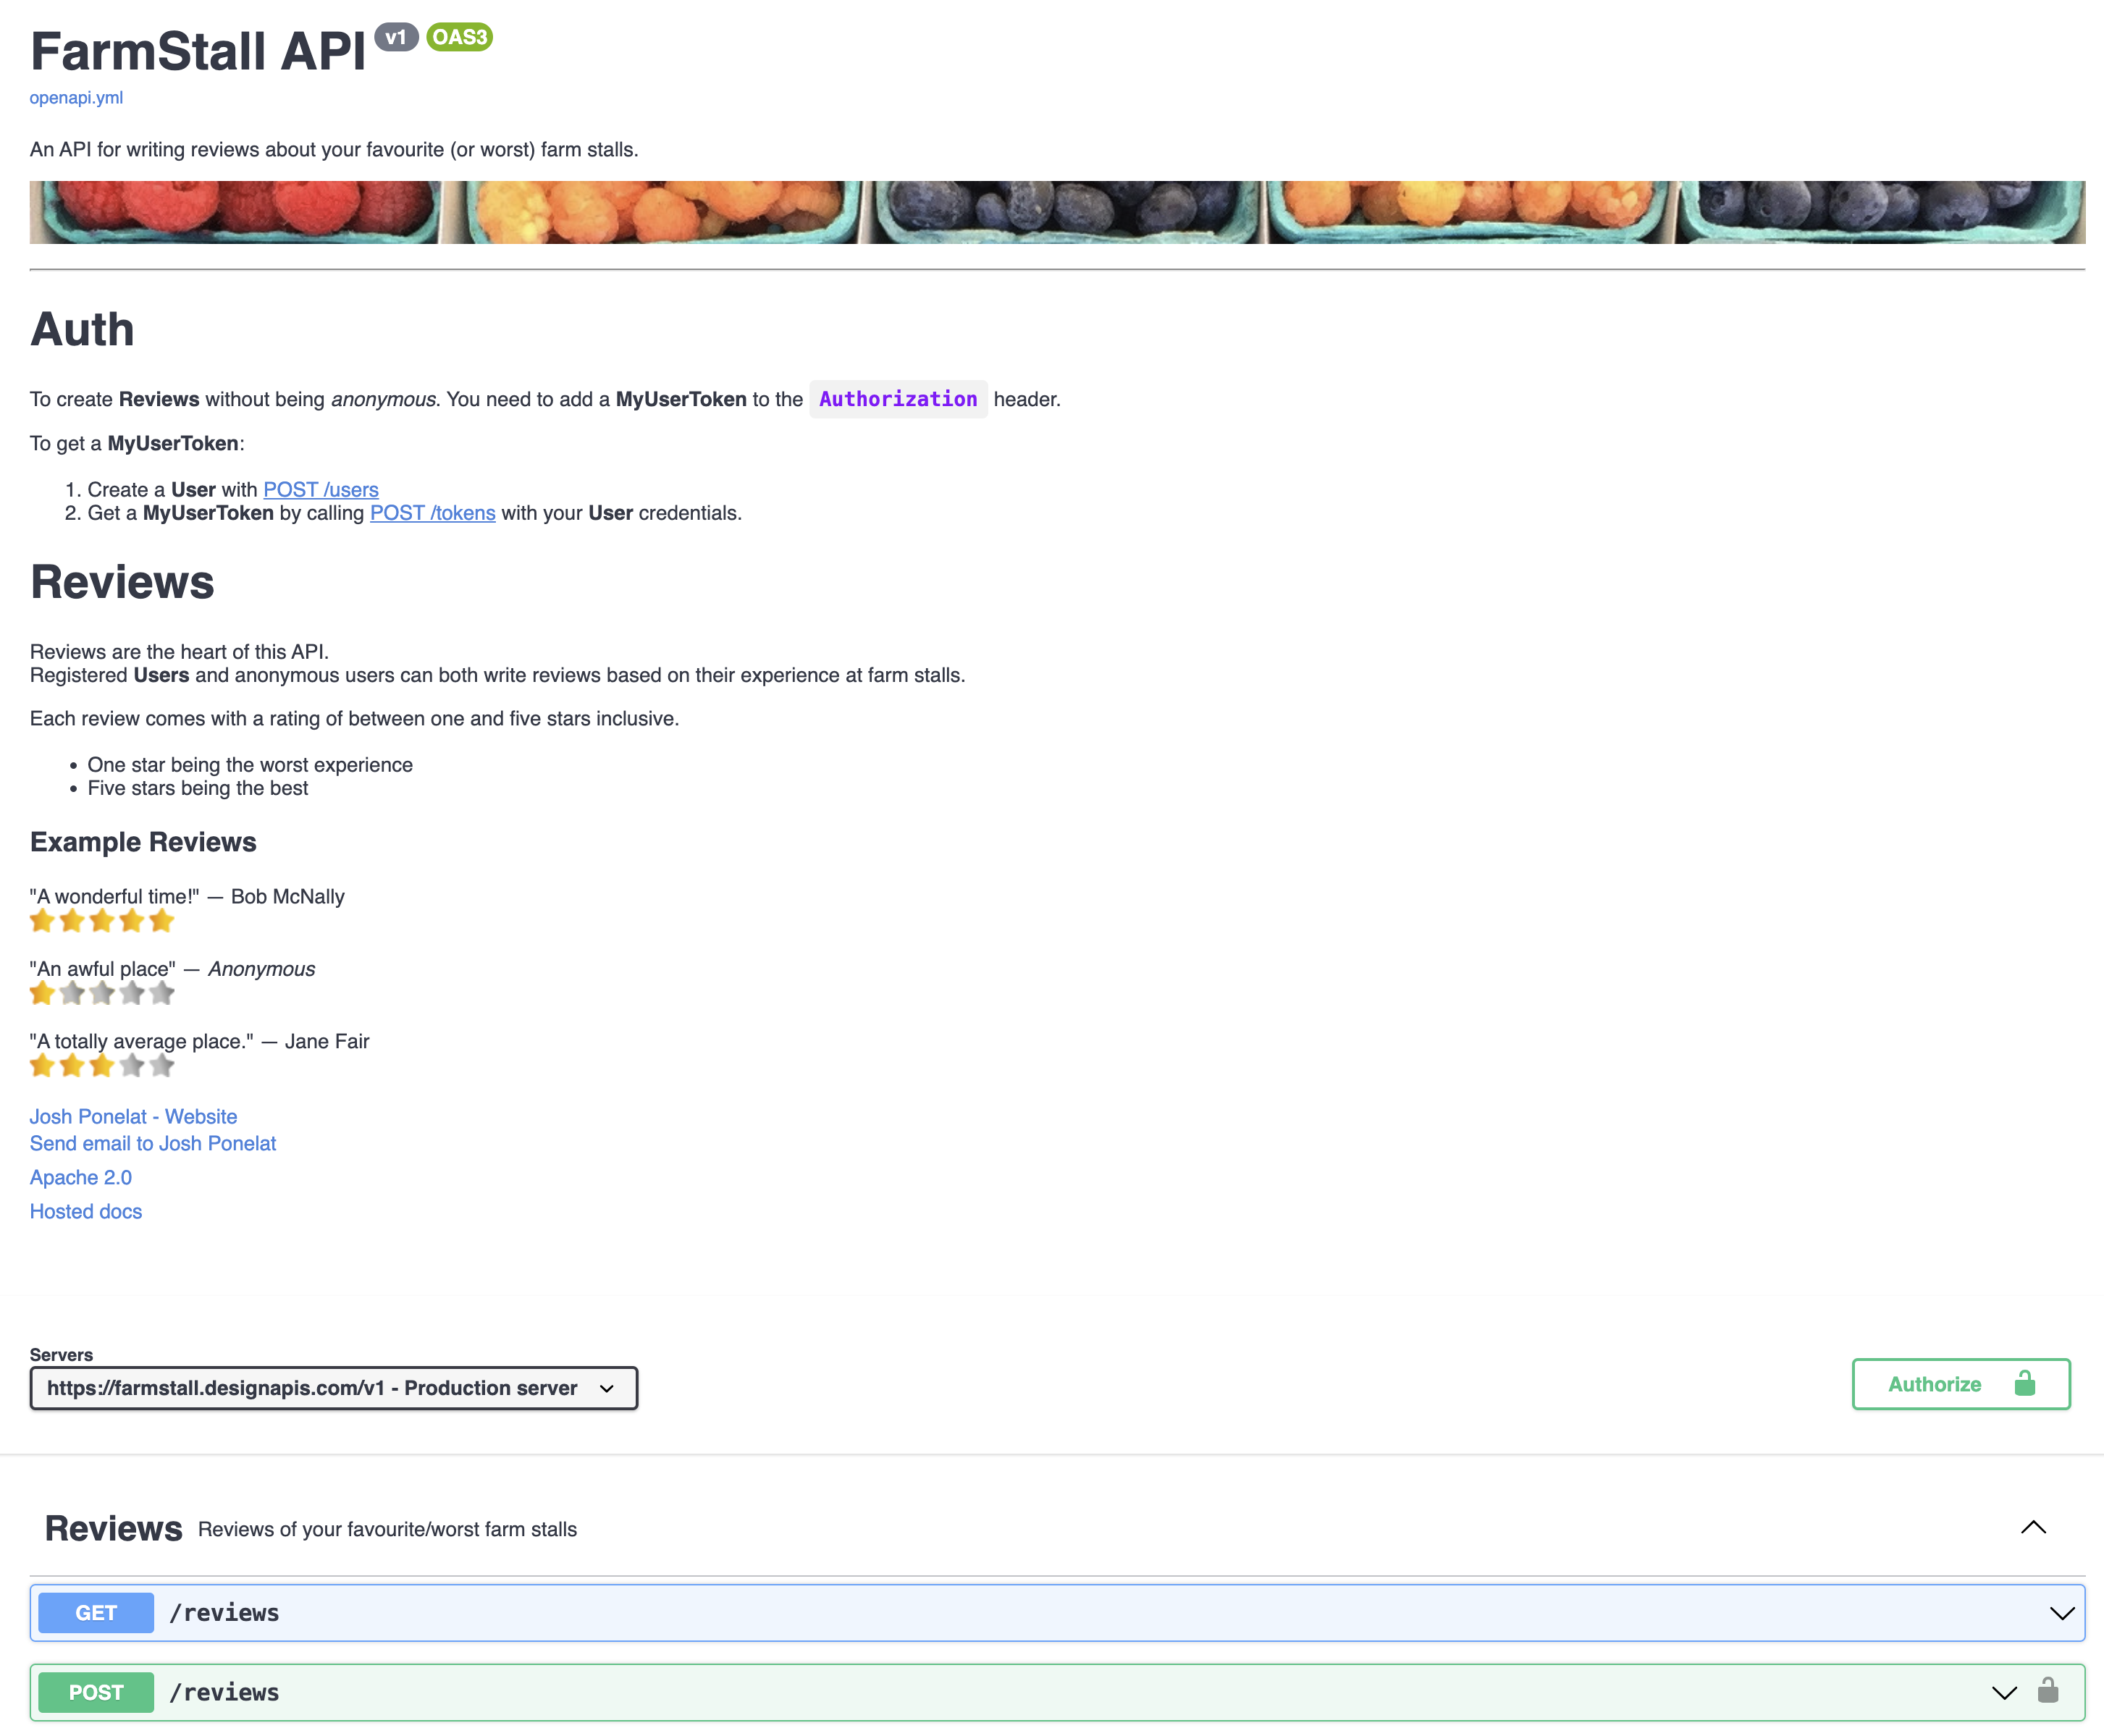
10. OpenAPI 브라우저에서 보기
yaml로 작성한 OpenAPI를 호스팅 하는 방법을 알아본다.
https://github.com/designapis/openapi/tree/main/ch08/site
ch08에 예제파일 index.html과 openapi.yml을 다운로드한다.
그리고 다운로드한 폴더에서 아래 명령어를 입력하고 http:/localhost:8080에 접속하면!!
$> python -m SimpleHttpServer 8080 # Python2 기준
$> python -m http.server 8080 # Python3 기준
책의 1부는 이미 만들어져 있는 직판장 API를 OpenAPI로 작성하는 법을 배웠다면
2부에는 백지상태에서 웹 애플리케이션에 필요한 새로운 API를 새롭게 설계하는 법을 배운다.